Creating a luminaire group
Groups can be created or modified only in Casambi pro for Windows.
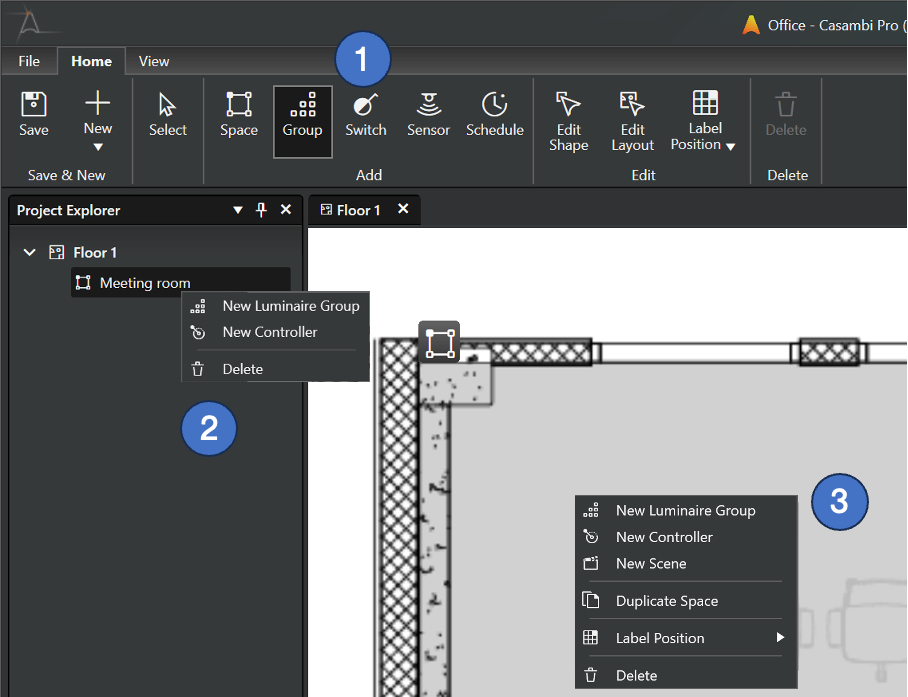
Methods for creating a new luminaire group
- Click on the Group tool icon button in the Home ribbon and use it to draw a group inside a space, or activate the tool by pressing the G key in your keyboard, or
- Right-click a space row in Project Explorer pane and select New Luminaire Group command, or
- Right-click over a space in the layout view and select New Luminaire group command.
When luminaire groups are created using the context menu commands, they will be created with default shape and size.
The Group Tool
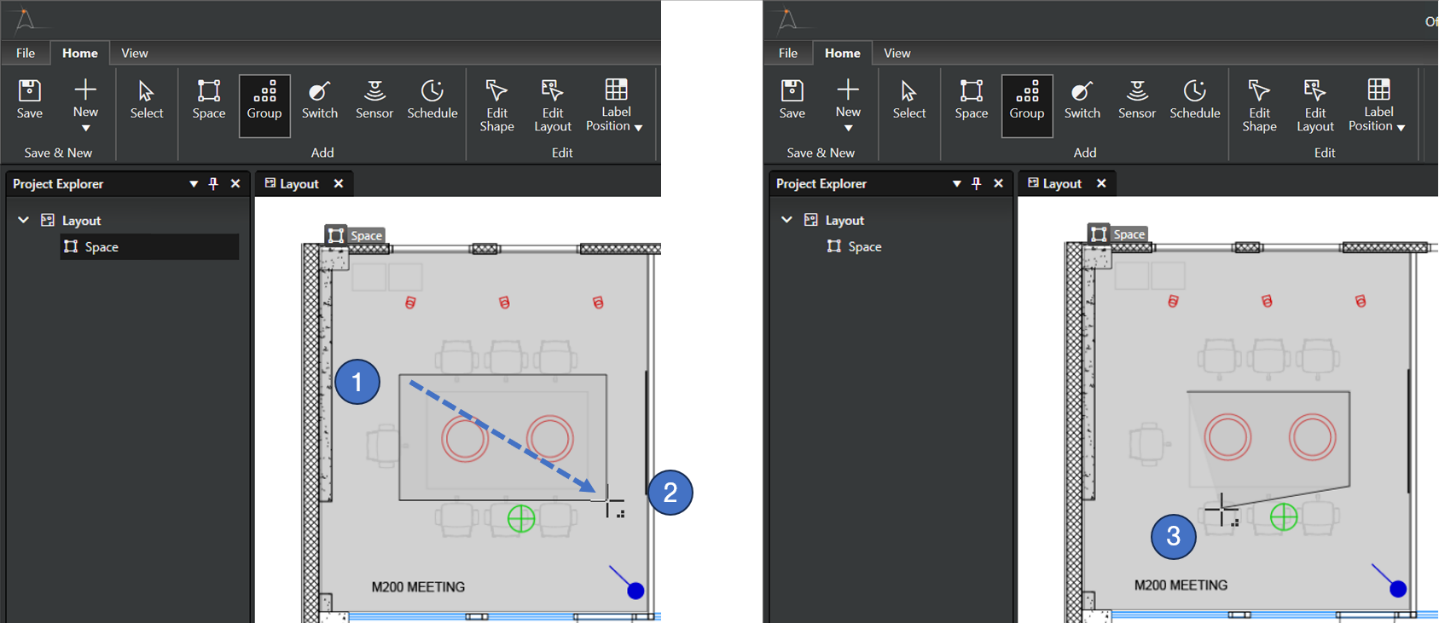
The group tool can be used for drawing luminaire groups on the layout in three ways:
- Click somewhere inside a space on the layout
- Group is created with default size and name
- Group naming dialog is not shown, the name can be edited in the properties pane
- Inside a space, press down the left mouse button and drag
- A group is created as a rectangle, user can adjust its size and shape while dragging the shape.
- When the left mouse button is released, the group is created with default name. The name can be edited in the properties pane.
- Keep CTRL button pressed and click in group’s corner points
- Each click creates a new corner point.
- A group must have at least three corner points.
- After clicking the first corner point, the CTRL key can be released.
- If the CTRL button is pressed during creation of the corner points, the guides are not shown.
- If the CTRL button is released after first corner point click, the tool provides guidelines to help creating 45 and 90 degree corners between the sides of the polygon.
- The created polygon will be closed and completed when the starting point is clicked again. The group is now created with default name.
The Group tool is used to define luminaire groups within a space. Groups must be contained within a space to be valid. When the tool is active, you can:
-
Quick Create (Click)
- Action: Click anywhere inside an existing space.
- Result: A group is created with a default size and name. The naming dialog is not automatically shown; edit the name in the Properties pane.
-
Rectangular Draw (Click and Drag)
- Action: Inside a space, click and hold the left mouse button, then drag to the desired dimensions.
- Result: The group is drawn as a rectangle. When released, the group is created with a default name.
-
Custom Polygon (Ctrl + Click)
- Action: Hold Ctrl and click to set the first corner point. Each subsequent click adds an additional corner.
- Guidelines: - If you release Ctrl after the first click, alignment guides (45°/90°) are enabled.
- If you keep Ctrl held down, guides are hidden.
- You can cancel creating the polygon by pressing the Esc key in your keyboard
- Completion: Click the starting point again to close the polygon.
- The group tool can be quickly activated by clicking the G key in the keyboard.
- The group tool can be changed back to the standard Select tool by pressing the Esc key in the keyboard.
Duplicating a group
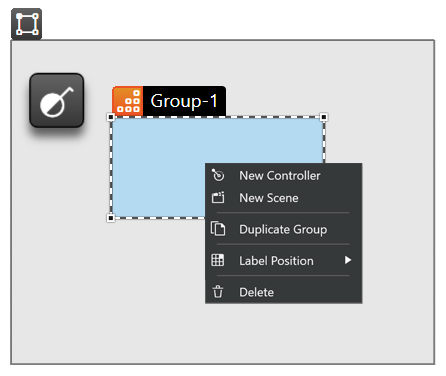
Luminaire groups can be duplicated only in Pro for Windows.
A group can be duplicated by using the Duplicate Group command in group’s context menu.
If the duplicated group already has some luminaires, only the group element is duplicated. Thus, the new copy of the group is empty.
The context menu also allows user to delete the group and add controllers into the parent space.