Pairing Casambi DALI Controllers
Pairing a Casambi DALI controller (a Casambi Salvador unit) is done in a similar way as any other Casambi Ready device from the nearby devices list, by drag-drop or clicking the link icon. The DALI controller will be paired
- On top of a Casambi DALI controller placeholder (like pairing a sensor or switch), or
- As a new device without a placeholder.
DALI driver discovery process
Step 1: Entering the Discovery view
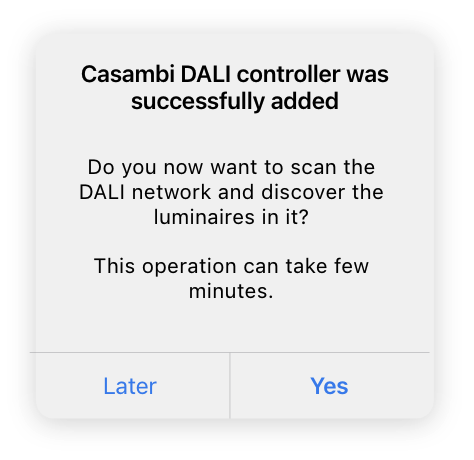
At the end of pairing of a Casambi Salvador unit, Casambi Pro will ask if you want to proceed to discover the DALI drivers in the DALI network. The discovery can be done also later if you don’t want to run the discovery immediately when pairing the Salvador unit.
The discovery view can be accessed also from the DALI controller properties.

The DALI discovery view
- The DALI discovery view shows only the spaces and groups which belong to the current network.
- It is possible to navigate between layouts if the network has spaces in more than one layout.
- After the discovery process is done, the discovered DALI drivers (luminaires) will appear in the right-side pane.
- The Scan button starts the discovery process.
- Buttons for saving or discarding the DALI configuration.
Step 2: Running the DALI discovery
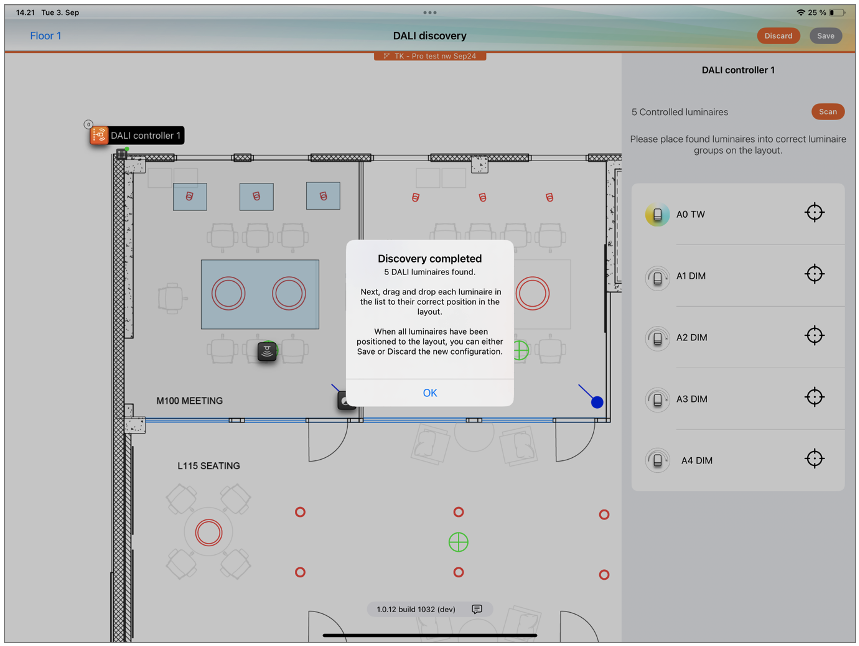
When the “Scan” button is tapped, the system starts to search for DALI drivers from the DALI network the Casambi Salvador unit is connected to. The discovery phase can take up to one minute. When drivers (luminaires) are found, they are listed in the right-side pane.
After the discovery is completed, following prompt is displayed.
Step 3: Assign DALI luminaires to luminaire groups in layouts
After the scan is finished, all found DALI drivers (luminaires) are listed in the right side of the screen. If it looks like not all drivers were found, you can run the scan again.
Next, you need to define in which luminaire groups the devices reside. The units can be added to the correct luminaire group either by tapping the “target” icon or by dragging the items from the list to the floor plan. All units must be assigned to a luminaire group before the configuration can be saved.
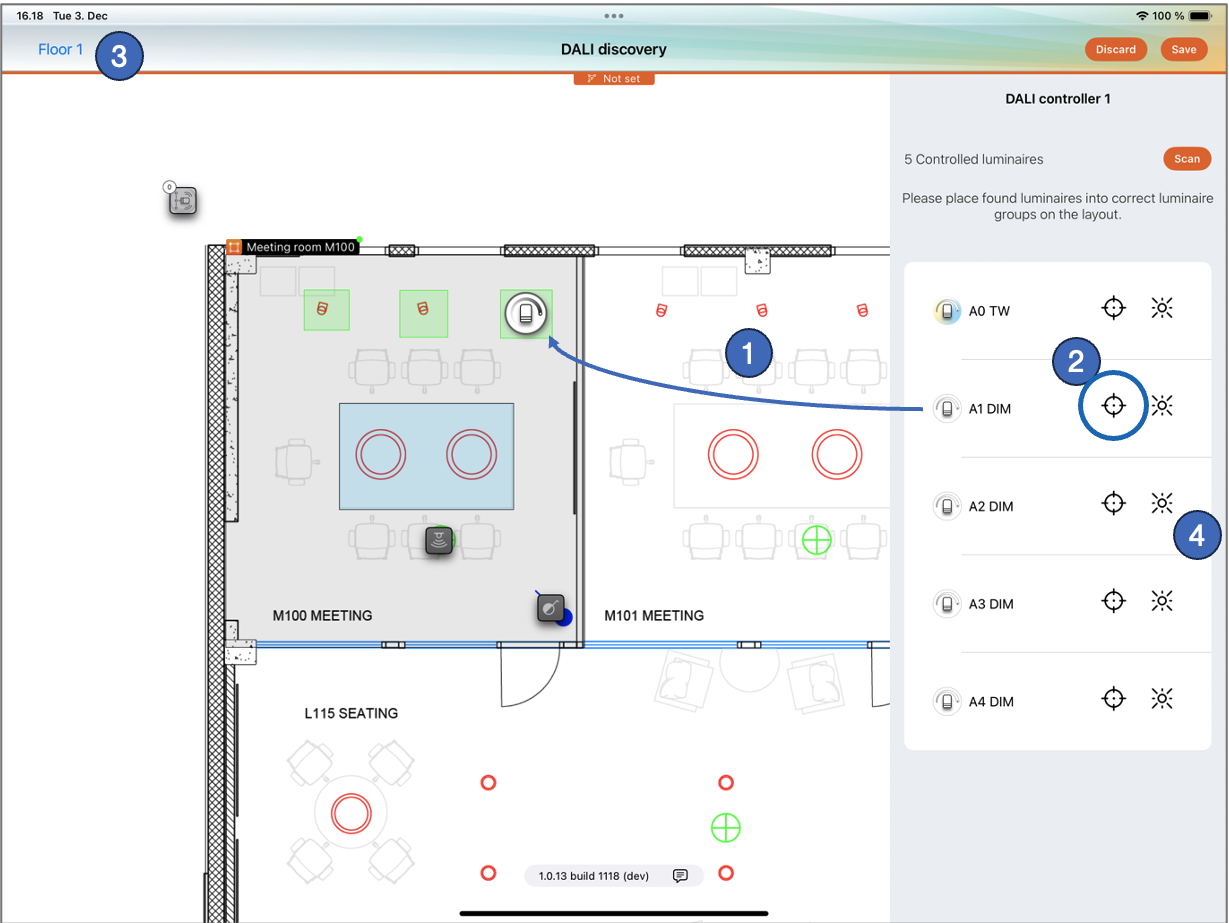
Placing the DALI luminaires to the floor plan
- Drag and drop a luminaire from the list, or
- Tap the Target icon at the luminaire list → The application asks into which group the luminaire should be placed.
- The visible layout can be selected from the top left corner. Note, that the layout list will contain only those layouts which have luminaire groups which belong to the same network as the DALI Controller.
- To identify each luminaire, tap the Blink icon → The luminaire starts to blink.
Step 4: Save the DALI configuration
After all DALI drivers (luminaires) have been placed into luminaire groups, you can either save or discard the DALI device configuration by tapping the Save or Discard buttons at the top right corner of the screen.
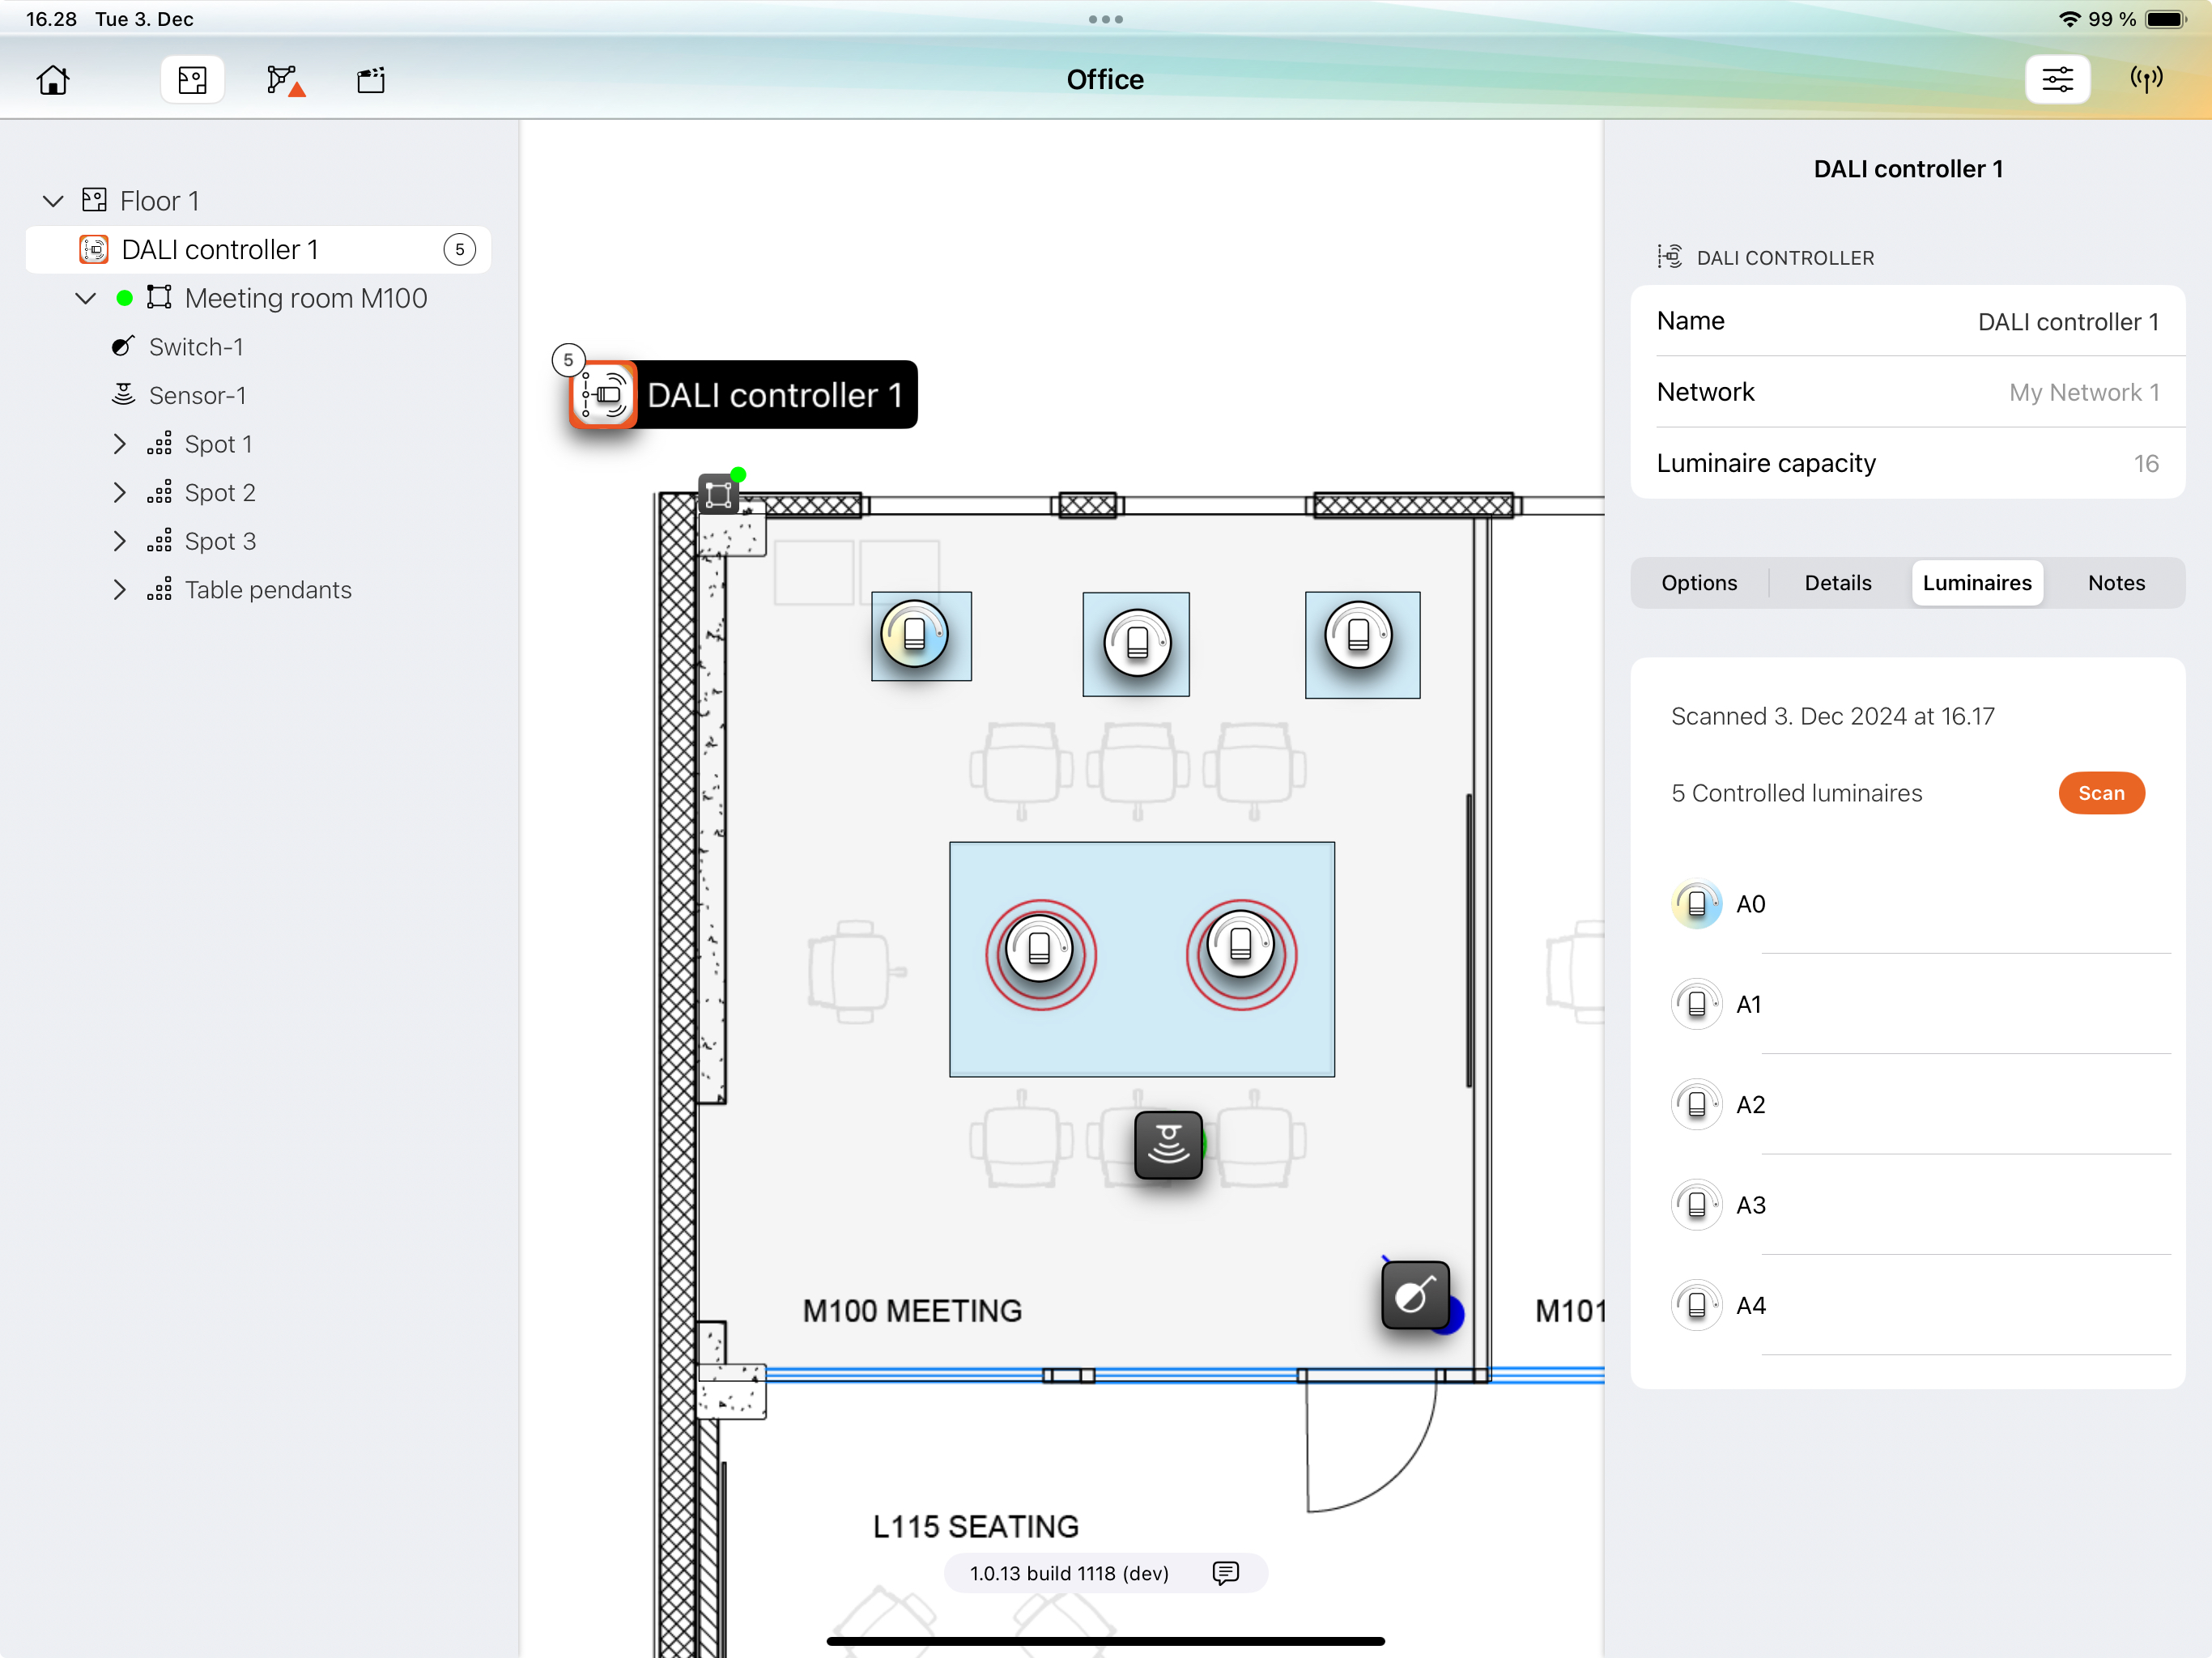
After saving the configuration, all DALI luminaires will appear in the project layout, and they can be controlled the same way as any other Casambi Ready luminaire.
DALI Controller properties after DALI drivers have been added: