Layouts
Overview to layouts
Layouts serve as the digital canvas for organizing spaces, luminaire groups, and controllers.
Key Requirements & Performance
- Every project must contain at least one layout.
- While there is no hard limit on the number of layouts per project, performance may decrease as more layouts are added.
- Large background images combined with a high density of devices can slow down the application.
Background Images
- A floor plan is typically used as a background reference for placing project elements.
- Background images are not mandatory; layouts can be created and managed without them.
- Supported Formats: PDF, PNG, JPG, and BMP.
- Unsupported Formats: Vector-based files such as DWG, DXF, or SVG are not supported.
Creating a new layout
New layouts can be created only with Casambi Pro for Windows.
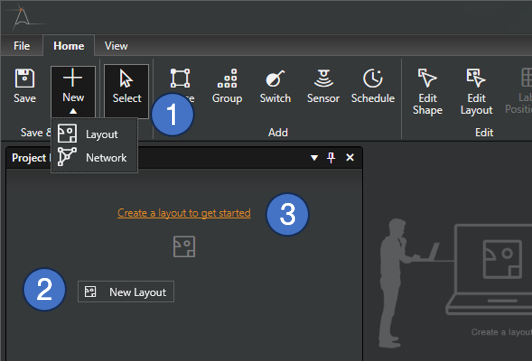
To create a new layout,
- Click on the New icon button in the Home ribbon and select Layout, or
- Right-click in the Project Explorer pane and select New Layout command, or
- If the project does not yet have any layouts, you can also click the orange link in the Project Explorer.
A New layout dialog is opened:
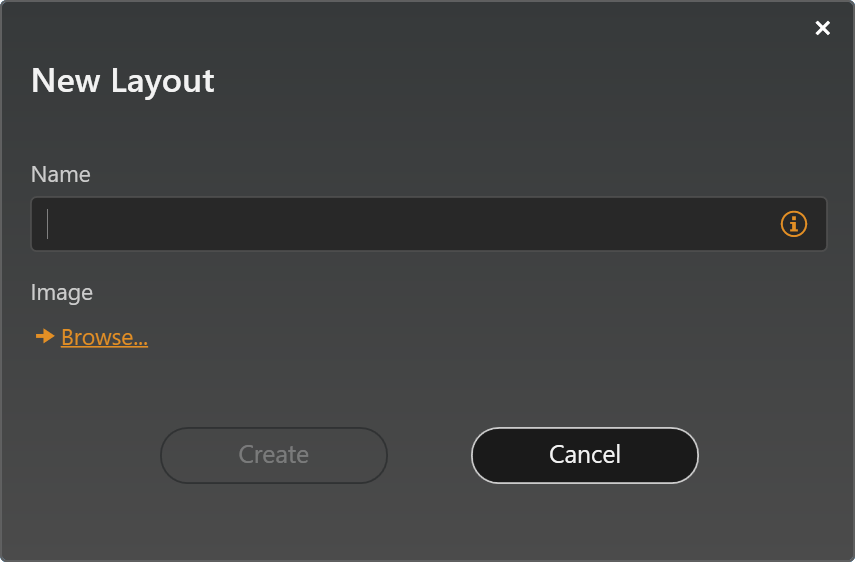
Enter the layout name in the Name field (the name is mandatory).
The background image can be added by clicking the Browse… link. A file browser is opened, where the image file can be selected.
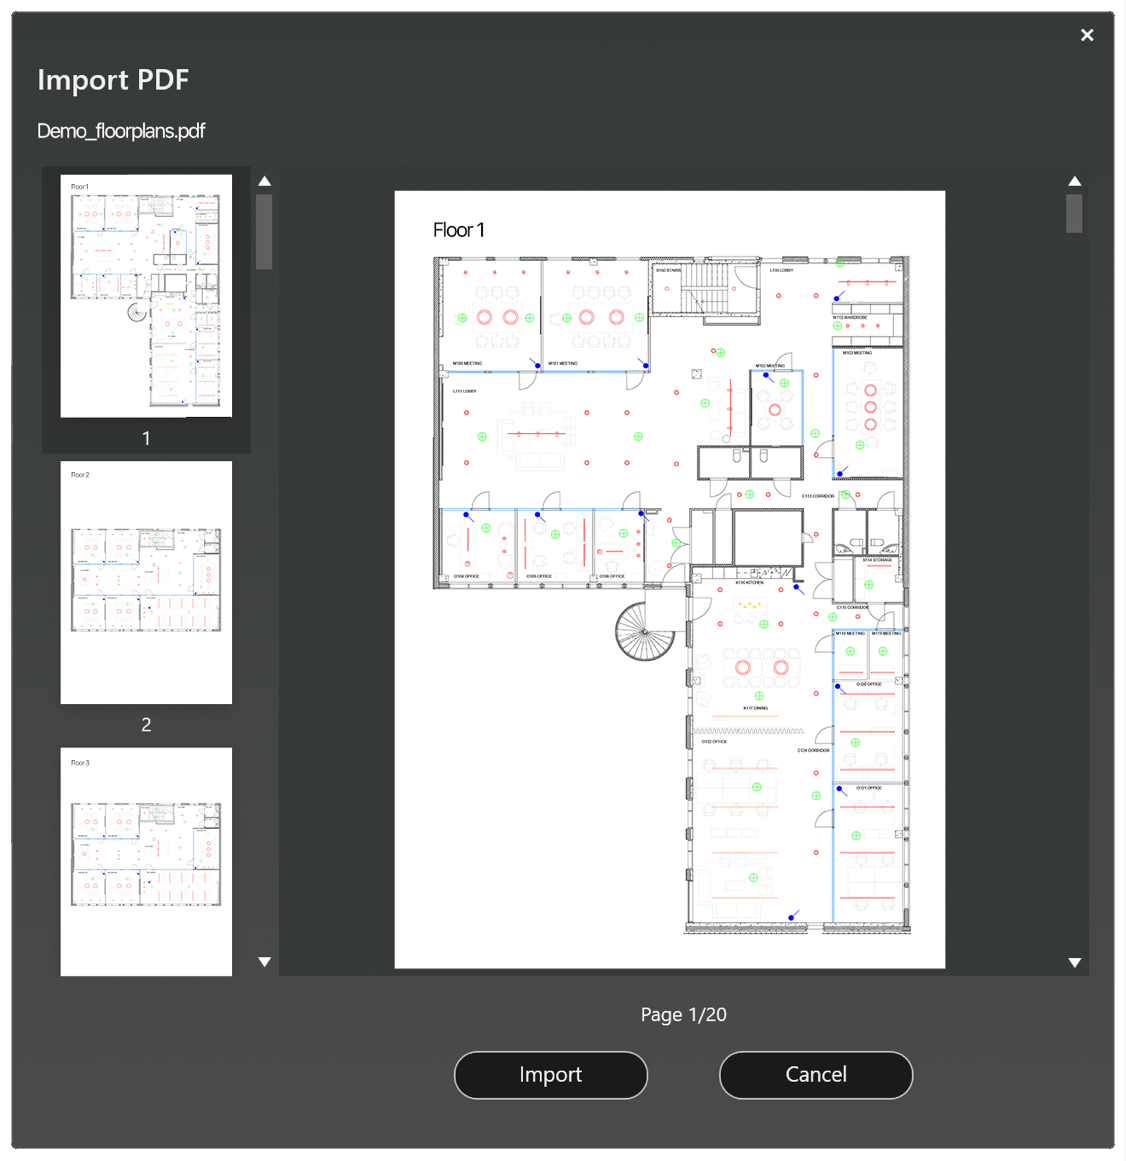
In case you select a PDF file, an additional dialog will open where you can preview and select which page in the PDF to import. If the image is in vector format in the PDF, it will be rasterized when imported to Casambi Pro. Please note, that the PDF import process can sometimes take a while, depending on the complexity of the file.
Layout image guidelines & best practices
To ensure optimal performance in Casambi Pro, follow these guidelines when importing layout images:
Image Specifications
- Resolution Limit: The maximum allowed resolution for any layout image is 5000 × 5000 pixels.
- Performance: Very large images or high-resolution files can significantly slow down the application.
Best Practices for Optimization
- Crop for Essential Content: Only include the necessary areas of the floor plan. Removing empty margins or irrelevant sections reduces file size and improves responsiveness.
- Manage Export Settings: When exporting from CAD systems to PDF or PNG, avoid excessively high resolutions and including unnecessary details.
- Use PNG for Reliability: If a PDF is slow to import or fails to render correctly, convert it to a PNG before importing.
Important Note on PDF Imports Importing complex PDF vector images may take several minutes. During this process, the application UI may appear unresponsive (frozen). *Do not close the application; it will return to normal once the import is complete.
Opening and closing a layout
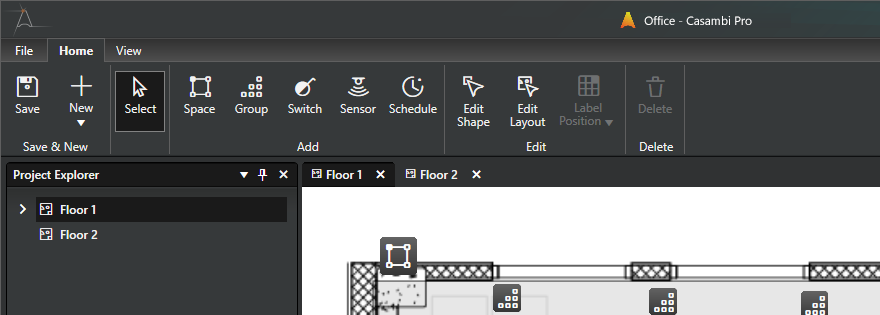
Layouts are listed in the Project Explorer pane on both Windows and iOS apps. To open a layout, click layout’s name in the layout list.
Layout viewport
Layouts are shown at the centre of the Casambi Pro screen, in the main viewport/work area.
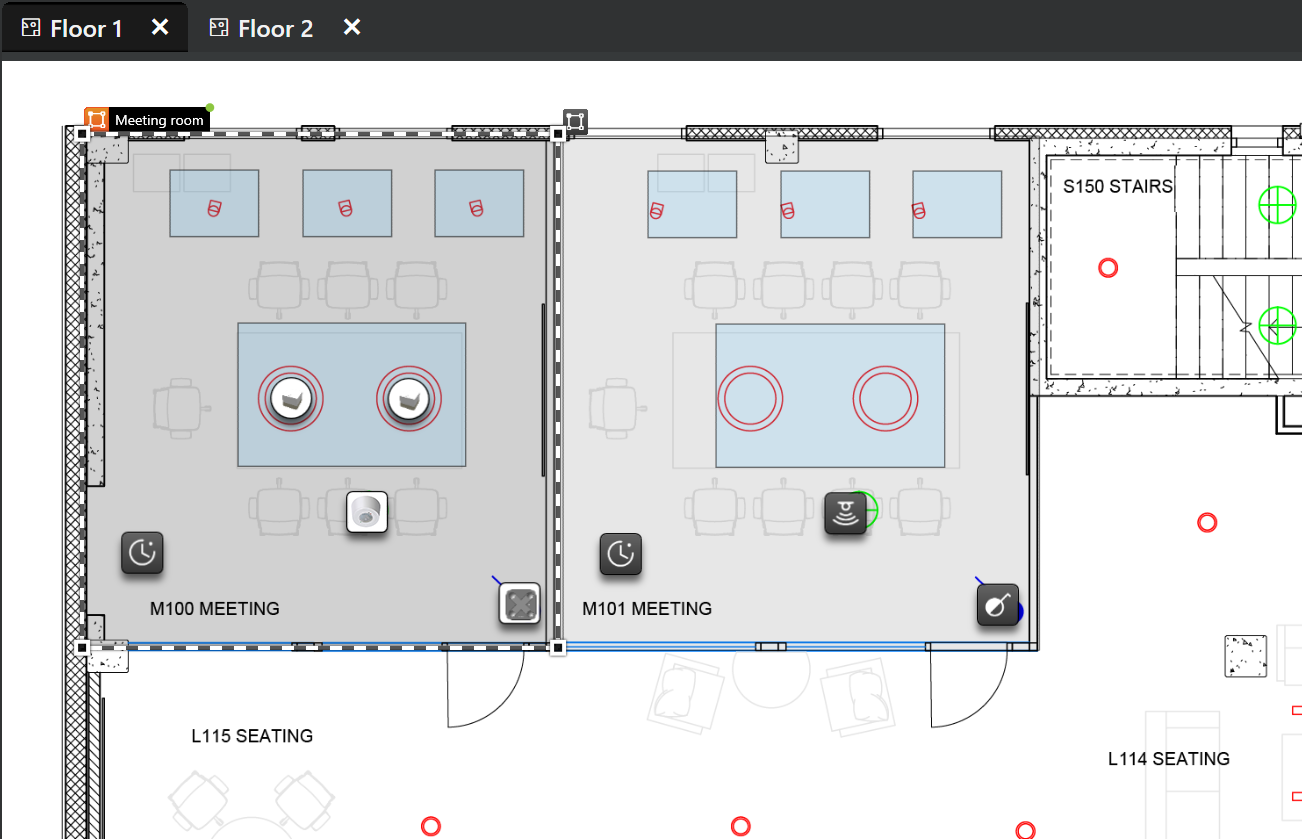
- The view can be zoomed in and out with the mouse wheel (Windows) or finger pinch gesture (iOS).
- The view can be panned horizontally and vertically by mouse click + drag (Windows) or finger drag (iOS).
- In Casambi Pro for Windows, several layouts can be open at the same time. Opened layouts are displayed as tabs on top of the layout viewport. A layout can be closed by pressing the X icon in the layout label tab.
- In Casambi Pro for iOS, only one layout can be open at a time. Layouts can be changed by tapping layout names in the Project Explorer pane.
Layout properties
When layout is selected, its properties are displayed in the Properties pane.
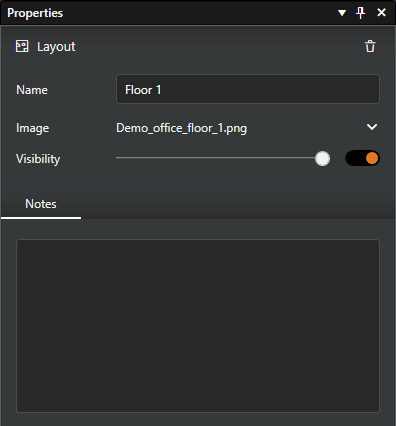
- Layout name (mandatory)
- Background image file. The image can be changed or removed by using the commands in the drop-down menu. When replacing the image, it is recommended to use same size, cropping and scale in both old and new images.
- Visibility of the background image.
- The visibility slider controls the opacity of the image. The switch control can be used for hiding the image.
- The Notes field can be used for entering text comments for the layout.
Deleting a layout
Layout can be deleted only in Casambi Pro for Windows by clicking the Delete button (trash can icon) in the layout properties.
Layouts containing paired devices cannot be deleted. Please unpair all devices first.
Notes about layouts
- Layouts can be added to projects only in Casambi Pro for Windows.
- When replacing the original layout image with new one, it is recommended to use same size, cropping and scaling than in the original image file. If the new image has different size than the old one, the overlay elements (spaces, controllers etc.) will be in incorrect locations. In this case, the background image can be scaled by using the Edit Layout button in the top ribbon.
- Networks are not shown in the layout views.
- Objects on a layout can be selected by clicking them. To select multiple objects, use Ctrl + click. While multiple elements can be moved together, their properties cannot be edited simultaneously. Note that some element combinations may not support multi-selection.
- Keyboard arrow keys can be used for moving selected objects on the layout. One arrow key press moves the element 1 unit to the desired direction, Shift + arrow key press moves it 10 units.