Editing spaces in the layout
In Casambi Pro for Windows, the space shapes can be edited in the layout. Adding or editing spaces or luminaire groups is not possible in the iOS version.
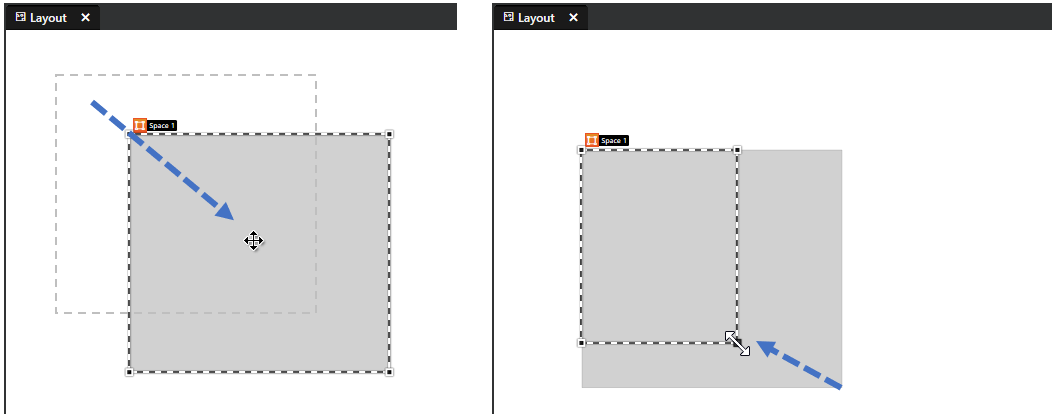
Moving a space
- Select the space you want to move
- Press left mouse button down and drag the space to new location.
- With Ctrl + click you can select multiple spaces
- Spaces can be moved also with keyboard arrow keys. One key press moves the element 1 unit, Shift + press 10 units.
Resizing a space
- Select the space you want to resize
- Move the mouse cursor over space's corner point or side → Mouse cursor changes to two-headed arrow.
- Drag the corner point or shape side to resize the space.
The Edit Shape Tool
The Edit Shape tool in the Home ribbon can be used to edit space and luminaire group shapes in the layout. To quickly change to the Edit Shape tool, press key E in your keyboard.
Moving a corner point
- Select the space you want to edit
- Select the Edit Shape tool
- Click and drag a corner point
Creating a new corner point
- Select the space you want to edit
- Select the Edit Shape tool
- Click and drag the middle point of a shape
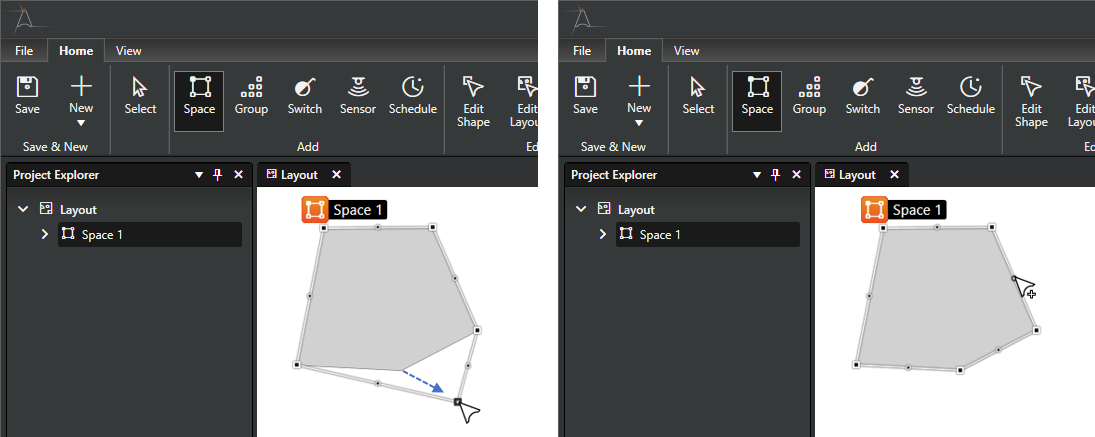
Deleting a corner point
- With the Edit Shape tool, click a corner point to select it.
- Delete the corner point by
- Clicking the Delete button in the Home ribbon or
- Hit the Delete key on your keyboard
The Label Position tool
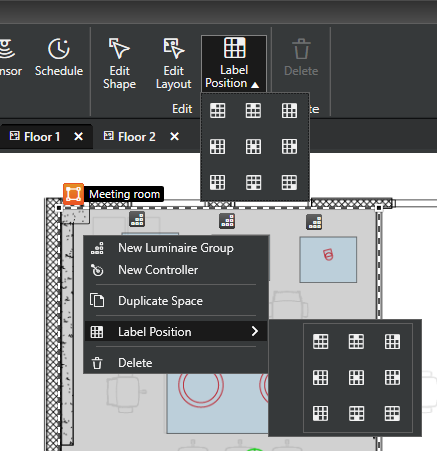
By default, space and group labels are positioned at top left corner of the area.
The label position can be changed by using the Label Position tool which can be accessed either from the Home ribbon or in the space right click context menu.
Label positions can be set only in Casambi Pro for Windows.
Space properties
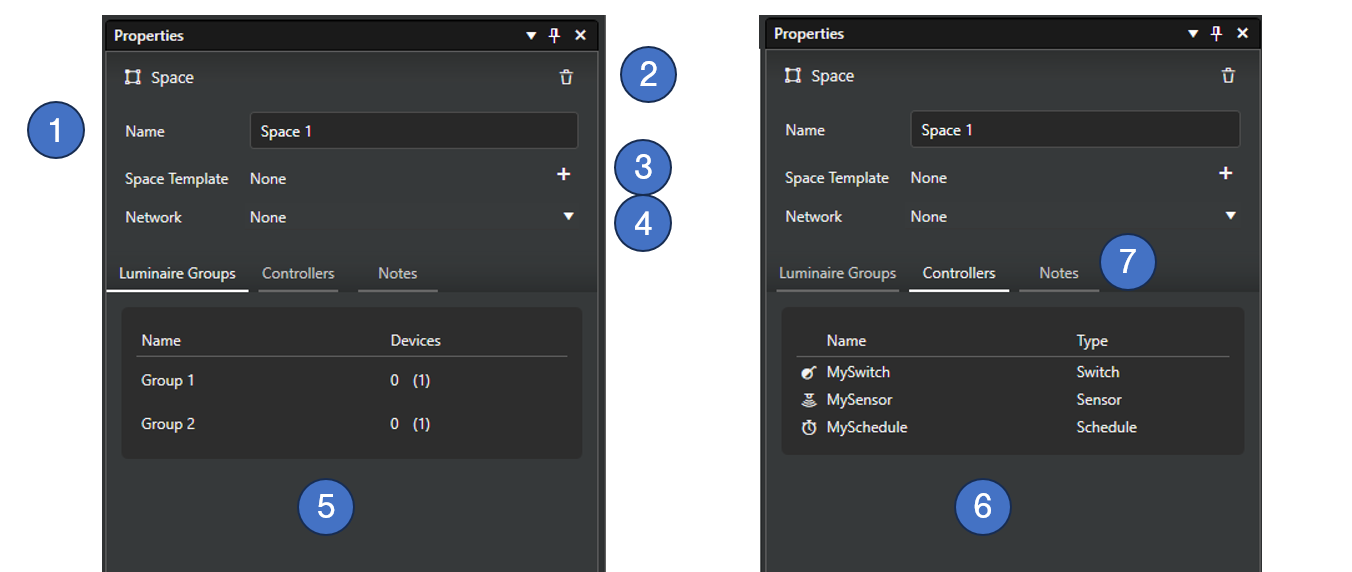
When a space is selected, its properties are displayed in the Properties pane.
- Space name
- A name is mandatory for every space.
- The name can be edited in both the Windows and iOS versions of the app.
- Delete button
- Removes the space from the layout.
- A space can be deleted if it does not contain any paired physical devices.
- Space template
- The name of the template used to create the space (if applicable).
- The Add button (plus icon) allows you to save the current space's configuration as a new Space Template for future use.
- Network assignment
- A space must be attached to a network before physical devices can be paired within it.
- The drop-down selection lists all available networks.
- Each space can belong to only one network at a time.
- The network assignment can only be changed if the space contains no paired physical devices.
- Luminaire Groups tab
- Lists all luminaire groups assigned to the current space.
- The Devices column Shows both the physical (paired) and estimated number of luminaires for each group.
- Clicking on a group row selects the group and displays its properties.
- Controllers tab
- Lists all controllers (switches and sensors) within the current space.
- Clicking on a controller row selects the device and displays its properties.
- Notes tab
- Provides a text input field for adding detailed documentation or specific instructions related to the space.