Creating a virtual controller
Virtual controller placeholders can be created only in Casambi pro for Windows.
Methods for creating a new controller
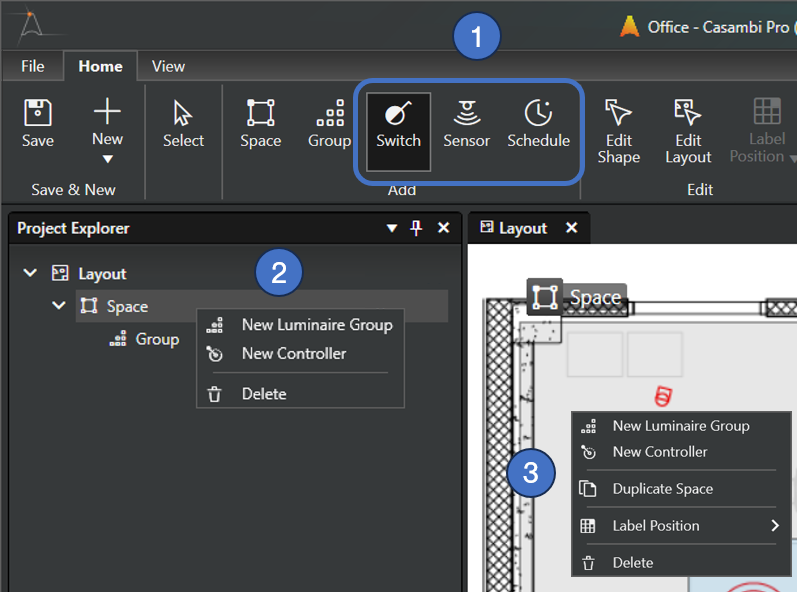
- Click on one of the controller tool icon buttons in the Home ribbon and use it to place a controller inside a space (use keyboard keys W, R or T to quickly activate the tools), or
- Right-click a space row in Project Explorer pane and select New Controller command, or
- Right-click over the layout over a space in the layout view and select New Controller command.
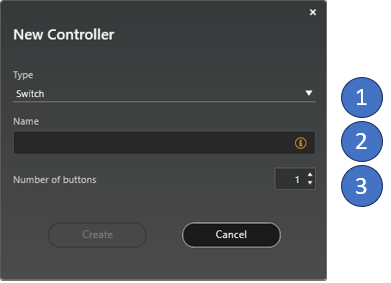
When a controller is created using a context menu command, a New Controller dialog is displayed:
-
Controller type selection.
-
Name of the controller (mandatory).
-
If the switch controller type is selected, number of switch button can be set here. By default, a switch has one button.
Controller tools in the Home ribbon
The three controller icon buttons in the Home ribbon can be used for quickly adding many controllers into spaces. The New Controller dialog is not displayed when using these tools for creating controller placeholders. All three tools work the same way.
Controllers can be created only with Casambi Pro for Windows, but they can be edited also with the iOS version of Casambi Pro.
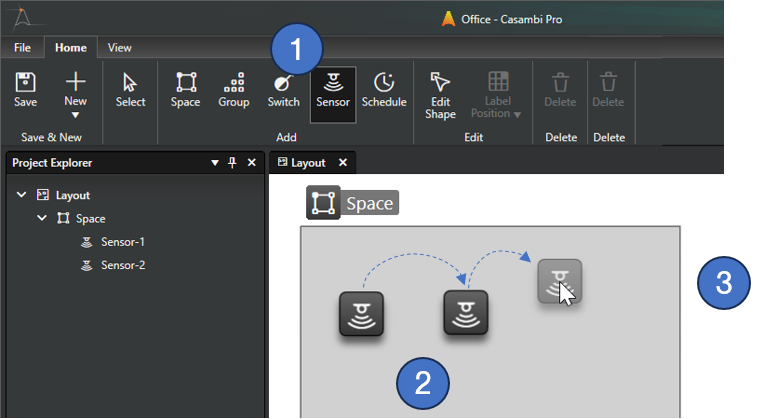
Using the controller tools:
- Select one of the three controller tools from the Home ribbon or use keyboard keys W, R or T to quickly activate the tools.
- Click inside any space to create a virtual controller. A new controller placeholder is created with every mouse click. New controllers will be named automatically.
- The Controller tool can be changed back to the Select tool by
- Hitting the Esc or V keys on your keyboard, or by
- Clicking the Select tool in the Home ribbon.
Also, selecting another tool from the ribbon dismisses the currently used tool.